Listings
The listings page allows Agents to create, manage, and share their listings with customers and other agents. Visit your listings page [↗].
Here is what a listings page looks like when shared:
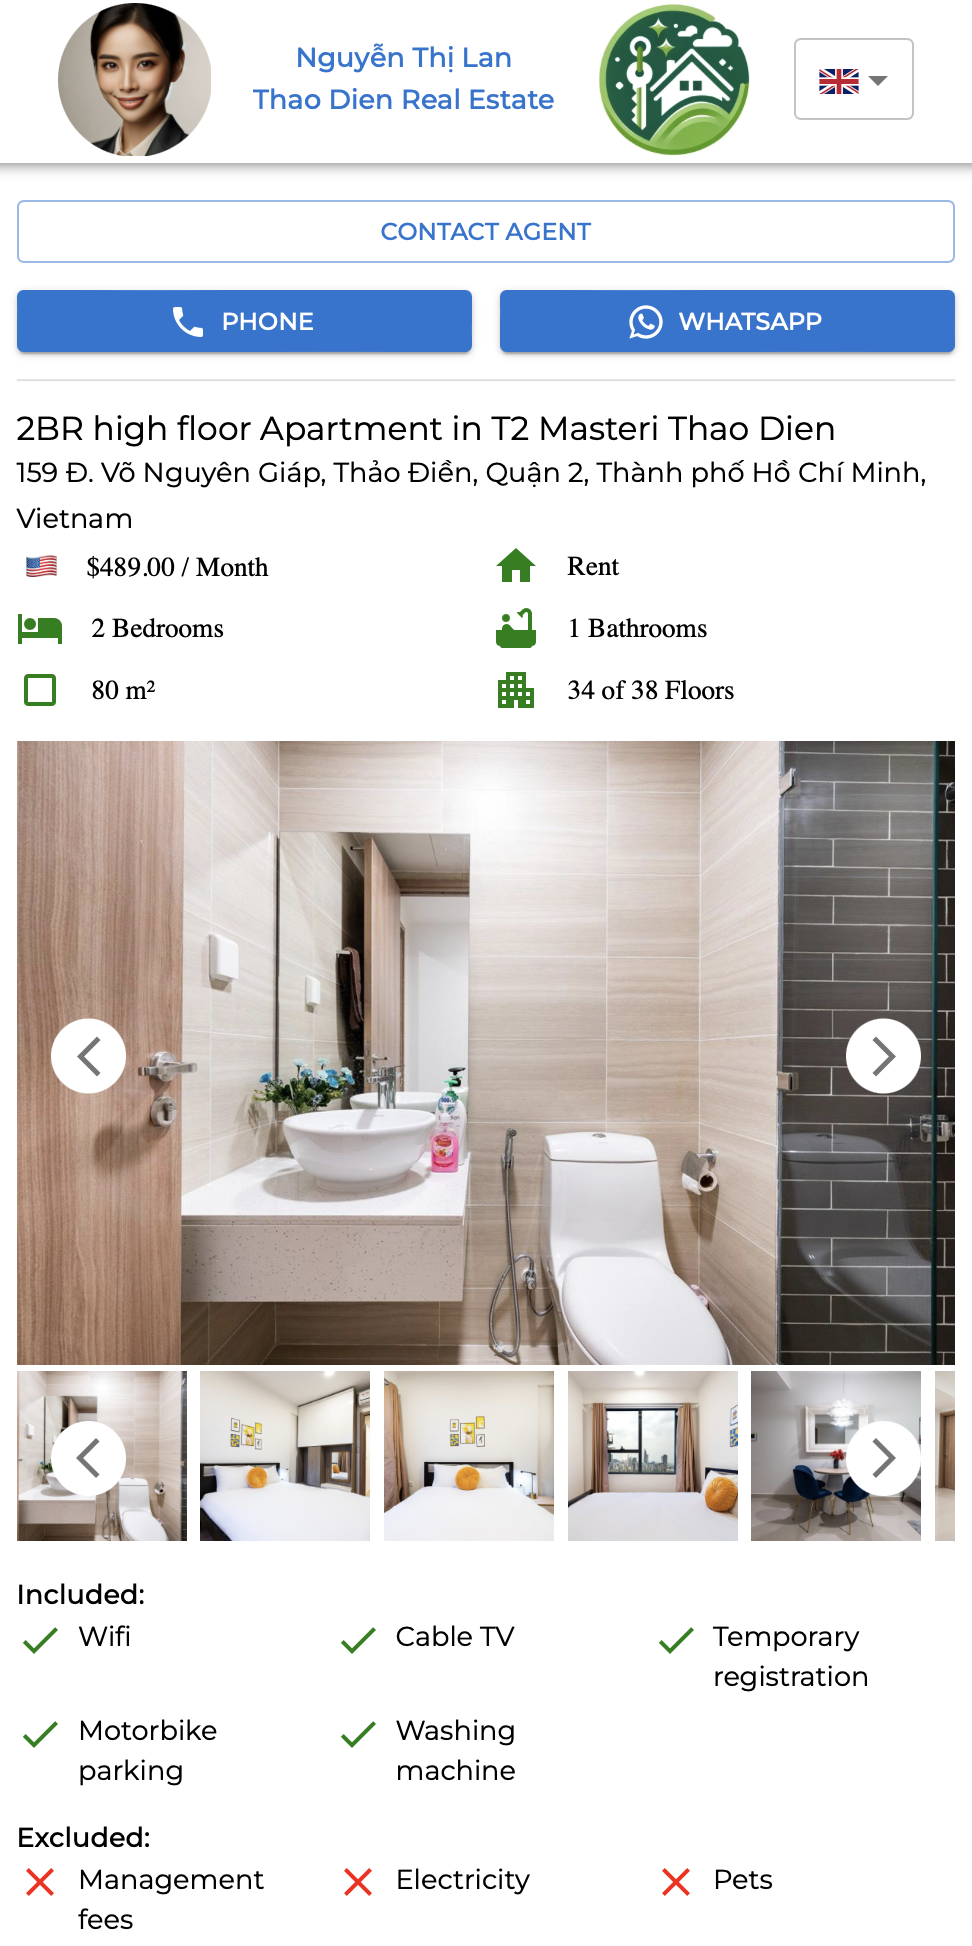
You can View it [↗] on your browser.
Create Listing
To create a listing, visit your Account Page [↗] and click on My Listings. Click on the +Create button, and the New Listing page will open:
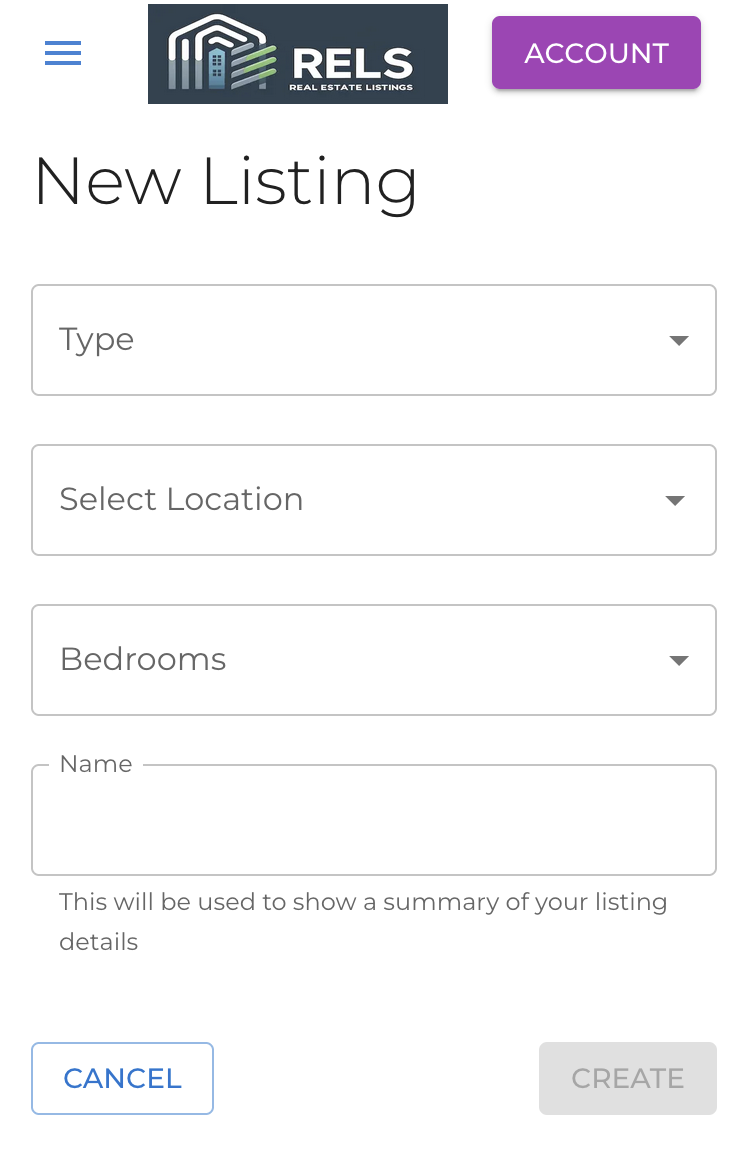
These are the minimal details for a listing. Don't worry, once you have clicked Create, you will be able to add more details & photos. See Manage Listing below.
View Listings
After you have created listings, you can view them from the My Listings [↗] menu. The app will show you a list of all your listings. Click on any to view and manage it.
Click on the Archive button next to a listing to put it into the archive (see below why). At the top of the listings table, you will see a toggle for showing Archived listings.
Manage Listing
After clicking on a listing from the "My Listings" page, you can view and manage the listing's details. You can manage the following details:
- Name: Use this for promotional purposes. A good listing name catches the attention of others searching for property.
- Type: Choose from "Sell" or "Rent".
- Location: Choose either a District or a Ward (preferable).
- Currency & Price: Choose from different currencies and set the price. Our platform will present the price to other parties according to their preferred currency.
- Photos: Enhance your listing with beautiful photos. This is the most selling point of your listing, so ensure you have multiple great photos showing the property.
- Bedrooms: Choose how many bedrooms (or studio) the property has.
- Bathrooms: Choose how many bathrooms the property has.
- Footage: Enter the footage in square meters.
- Floor: You can enter the floor as well as the number of floors in the building if relevant.
- Move-in Date: Enter the starting date when the property becomes available.
- Duration: For rentals, you can enter the duration of the rent. Add optional clarifications in the Description if needed.
- Description: Enter any additional details describing the property, its amenities, etc., which are not available in the rest of the form.
- Included: Enter any amenities included in the apartment.
- Excluded: Enter any amenities which are specifically NOT included.
- Common: Here you can select any common amenities included in the building itself.
- Notes: This is a private section where you can enter any notes you wish for yourself. These notes are not shared with other agents or customers.
- Visibility: Choose the visibility of this listing (Public/ Network/ Private). See RELS Listings for more details on visibility.
When finished updating, click on Save to keep your changes. Click Cancel to discard changes and return to the My Listings page.
Share Listings
At the top of the Manage listing page, you can find the "Preview" button. Clicking on it will open the listing page for you to preview. When ready, you can use the link of that page to share with your customers & other agents via chat, email, social media, or website.
Note: YOUR contact details are shown at the top of the listing. The viewers of the listing cannot see the original owner of the listing. Only you can do that by clicking on the "Original" button found at the top of the "Manage listing" page.
Archive Listings
Instead of deleting listings you are no longer working with, you can simply archive them. They will be kept for you for future use. You can always view your archived listings and unarchive them back into use.
Archived listings cannot be viewed by others and are not searchable.